Old Soldier's Guide for Newbie Chuggers
Admin Note: Club Motorhome member 'Old Soldier' has kindly sent in the following.... which are extracts from email correspondence that he had with a friend who was new to motorhoming and had asked for help and advice in the early learning days. All I've done here is to compile these extracts into the format of an article which may be of great help to other new motorhomers.
Thank you Old Soldier!
Owning an expensive motorhome can be expensive!! The cost of fuel, servicing, repairs, additional equipment, insurance, tax, habitation checks, gas bottles, tyres, campsites, are all in addition to your daily living costs of food, places to visit, cloths etc etc. A fortune can be spent if what you want are expensive brand name services and equipment, there are cheaper alternatives that have worked for Les and I for years.
If you have the space then keeping the van at home on your drive can save a fortune in storage costs, It also gives you the opportunity to keep your eye on your van, you can keep equipment in the van that you also might want to use at home or in the garden, and it makes loading and unloading simple and easy.
CHARGING THE BATTERY at home
You can charge the van by getting a 16A / 13A plug adapter and plugging it into the garage when needed. Vans don't need to be on charge all the time, If nothing is switched on and draining the battery then it should only need an overnight charge once in awhile. Buying a small battery monitoring gizmo that is attached to the habitation battery will give you an audible warning if the battery power drops to a low level. Remember the vehicle battery is independent from the habitation battery. It might get charged at the same time as the habitation battery if you have the charging circuit switched correctly whilst the engine is running but it is not guaranteed that the vehicle battery gets charged from an external 240v supply or, if you have one a solar charging supply. Check it out.
Power supplies

Most sites who have electrical hook up points have 16A. sockets. In some cases, like the Caravan Club sites those sockets need to be twisted clockwise once you have inserted your male end!! This "switches" on the supply. To release your plug then you press the red button first. Always connect your female end to your van before plugging in your plug to the supply point. (Safety). If your cable is on a spool or cable carrier it is important that you unwind the whole length and lay out the cable flat on the ground before use. Electrical heating devices ( Kettles, Ovens, Hairdryers, etc, use high amounts of power and this can cause heat to build up in tightly spiraled cables which can then ignite.
Most supplies in UK are tested and stable. Not so in much of Europe. Having an European adapter is essential but you should also take a polarity tester and polarity conversion cable. Many times abroad we have found the live and negative cables swapped round. Now with modern safety cutouts it's not a real danger, most 240v electrical items will work normally however it does mean that the van sockets will still be live even if you have switched them off. Potentially dangerous. We have also had a couple of CD players pack up because of it. For the sake of a few quid, be safe, carry a tester and a polarity changing adapter.
GREY WATER
Whilst on site, ensure you have a container so that you can empty your grey water tank without having to move the van every time. Some use a large waste master tank that can be wheeled about, I just use a bucket. that can also be used for washing the van and is also a fire bucket if needed. Most sites will have proper disposal facilities, may even have super pitches where you can connect a suitable pipe from your tank directly into a drain, but there are some smaller sites, CL's / CS's, farm sites etc that only have hedges and borders. Provided you are not putting anything nasty down the drains then it is not a problem.
It is always best to ensure your waste water tank is emptied when you leave a campsite, no point carrying waste water about, just adds to the weight you are carrying. If you are just driving between sites then that's all you need to do. However you will find that there is probably still some residue in the grey tank that did not drain out and you don't want it sitting there in the tank for days / weeks on end in storage or on your driveway. Although it is frowned on by some the trick is to drain all you can at the disposal area FIRST, then crack open the waste valve slightly so that you leave this relatively small amount of non toxic water behind you as you travel around bends and corners. Pick quiet roads and shut the valve as soon as the tank is completely empty. Leaving it in the tank can result in smelly drain smells!! If you have a sloping driveway at home it is useful for draining any residue out of the grey tank.
BLACK WATER
Black water is toilet water. Normally contained in a cassette stored under the WC. A few things to remember about using and emptying the loo. Firstly, don't try to remove the cassette without warning the other half!! If the valve in the loo ( trap) is open then the cassette cannot be moved so you will be pleased to know that you can't empty whilst someone is sitting on it!! However.... If the other half is in the bad habit of only opening the trap after using the loo it is theological that you could have removed the cassette with disastrous consequences....... leaving you with a real mess to clean up under the loo.!
You need to add chemicals to your empty toilet cassette, with a small amount of fresh water, so that the contents are broken down biologically. I have used all sorts over the years. Washing machine biological sachets can work ok but they don't tend to disguise the colour or smell too well! The best I got were dry powder sachets, bought from someone on eBay, 50 a time for £10. They had "For aircraft toilet use only" written on them. Suddenly they stopped being advertised so I guess whoever was nicking them at Heathrow was caught!! Whatever you get, make sure they are perfumed, it makes for a much nicer experience for everyone!!
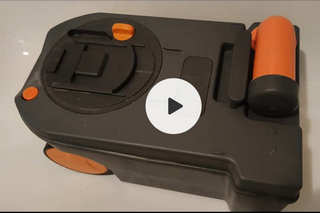
Your van may be fitted with a cassette that has wheels attached as well as a handle to pull it along. If not, then a small lightweight folding trolley unit can be a big help, particularly on large sites where the Chemical Waste Emptying Point (ELSAN) is located miles away!
The frequency of emptying both black and grey water will depend on usage. If on a campsite I always use the campsite facilities but Les prefers to use the van facilities, if wild camping then we find that we need to empty every couple of days or so. Of course us blokes can extend that if you are pitched up on your own with a few bushes around! (A wee one only of course!)
FRESH WATER
Some folk travel with a full tank, that's about 80 ltrs (or more) and at 1kilo per ltr, that's a lot of weight. My home water is on a meter so not only am I tight but for me I prefers to travel lighter and fill up on arrival provided water is available. I only carry about a quarter tank and, as I don't drink from the freshwater tank, I also have a couple of 4 pint ex milk containers of fresh water for drinks etc. Many people with modern vans will drink tank water, some vans even have water filters built into the system. Some folk bring their own portable filter system. Although you can get purifying tablets and other tank cleaning products I have never used them. I open the large inspection hatch regularly and flush out the tank from time to time.
It's good practice to top up the fresh water tank on arrival at a campsite but many sites now have water taps dotted around nearby, some even have a tap per pitch. Topping up as you stay on site can be done by either moving the van, using one or two 10 ltr watering cans, having an Aqua roll container and pumping the water into the tank or by using a suitable length of hosepipe. Moving the van is hassle, an Aqua means dragging it to the nearest tap, filling it, rolling it back to the van then using a suitable 12v emersion pump to transfer the water to the tank. We use to do both methods, too much hassle and you also have to stow the Aqua tank somewhere. My preferred option to top up is using the watering cans, provided the distance to tap is not too far. OK, you might need to make a few trips back and forth but by having two 10ltr watering cans you balance the load and make less trips. The other advantage is that service areas are always a good place to stop and chat and meet new people, you can also get rid of your rubbish on the way, plus it can be good exercise!! The alternative method is to use a hosepipe, this is great if within range of the water supply, is fairly quick and easy and can also lead to interesting conversations as the hose splits, fittings come apart or you loose control of the end and it sprays everyone on the site!! There are many debates as to what type of hose is best. Garden hoses are heavy, not easy to stow away in a small space. Flat hose pipe on stowage reels are better, they take up less space but can be difficult to roll up after use. Personally we carry two or three differing lengths of a newish product called X Hose. Can also be named "Stretch hose" or "Expanding hose". Basically it is a rubber hose inside a canvas type outer cover. As water pressure builds up inside the hose the whole thing expands about three times it's original length. For example, 50 ft of hose will more or less reach a tap that is 150 ft away!! Allowing for a small drop in length as you fill the van due to the loss of full pressure they are brilliant. They are so lightweight, almost self emptying when you close the supply tap and take up much less room than any other type of hose. By having three differing lengths you use only the length needed or you join all three together and can reach almost any tap on the site! I often offer a free water filling service to those vans in range whilst I have mine out. Whatever hose you use make sure you have plenty of hose connectors, differing tap size connectors etc etc. Another tip, don't buy tap and hose connectors in motorhome / caravan dealers, B&Q and other outlets are much much cheaper for the same things.
There are some motorhomers who state that water hoses MUST be "Food Safe" as plasticides can leach out of non FS hoses. Load of twaddle, It might happen if you left the hose connected to the water supply, charged with water for hours or days in hot sunshine and then used, but most uses of hoses are for a few minutes, the water passing through the hose in seconds. If normal hoses were that dangerous they would have banned them years ago. AND guess what...Food Grade hoses cost much more!!
GAS
Not sure what gas system you have? Some vans have onboard fitted tanks that can be filled up at garages but most have stowage for a couple of gas canisters. You will have a regulator, it needs regular checking and I think needs changing every 5 years. The rubber gas pipework also needs checking and changing regularly.
Remember gas fittings are opposite to plumbing fittings so you will need to turn the connecting fitting ANTICLOCKWISE to tighten and CLOCKWISE to release. Make sure you have a gas detector in the van just in case something goes wrong.
NEVER travel any distance with the gas turned on, always shut the bottle or tank valve. (Part of your moving off check list).
If using the gas for the first time for awhile it is sometimes worth "bleeding" the system first. Easiest way is to light up one of the cooker rings for a few seconds. This is particularly useful when lighting the gas fridge or gas heater. Don't forget to turn on the gas supply at the bottle!!
Three way fridge. Gas, 240v mains and 12v AC
Most vans have this type of fridge. Best use is mains power if you have it connected. Alternative is gas, read the fridge working instructions. In most cases you turn the gas temperature valve to "ignite", switch on the igniter switch and it will light up when the gas has ignited, then adjust the temperature valve to suit your needs. The RED 12v switch works off the engine alternator so will only work when the engine is running. It will not chill the fridge but rather keep keeps it at the current temperature whilst you are driving about. Therefore it is important that you cool it first before moving off. Fridges do not like to work at all if parked at an incline, so if like us it is parked on a sloping drive at home you may need to level it out overnight before departing or put some frozen freezer packs in it for your first journey.
Packing the van

Be aware of your axle weight limits and in particular your payload limit. It is all to easy to overload the van. Having a towbar on the back is great for protection from rear end shunts, but it can also be tempting to add a tow bar fitted scooter rack ( with scooter!) Plus a cycle carrier and all on top of what's a long overhang. This can really affect the balance of the van. Know where your water tanks are, travel with limited fresh water if you can.
Tables, leisure chairs, BBQ's, TV's, bedding, clothes, food, bottles of wine and beer, etc, etc, etc, etc all add up and that's on top of all the fixtures and fittings that have been built onto that unsuspecting vehicle chassis!! Where possible, load heavy items low down and near the centre or back axle of the van. We keep our outside chairs / tables in the midsection loo when travelling, you might have a large "garage" or storage area under the fixed bed,, if you have one.
That's enough for now, I know it all sounds a lot but after awhile it will all fall into place, you will wonder what you were worrying about!!!!
The main thing is that you will enjoy your adventures.
Regards. Pete.
See Part 2 >>>>


 (share) button at the bottom of your screen,
 ( Add to Home screen ).